First you want to get your fabric layered how you want it to be in the diaper. I like to have my inner layer on the bottom of the stack right side facing down followed by the hidden layer, also right side facing down. Then I top it with my outer layer facing right side up. Lay your pattern down and trace it out and transfer all marks. When you go to cut it out do not cut it out on the line, cut around the line. I add my soaker snaps now.

I usually start at the back elastic point on my right of the diaper. Set your needle to the far left position and stitch a basting line from one point to the other. Do not lock your stitches! You want to be able to pull out the basting stitch line when you are finished.

Your guide line will end up being almost a half of an inch away from the cut line on the diaper. Do this for the other leg and then the back.

All elastic placement guide lines stitched out.

Now it is time to thread your elastic between the layers.
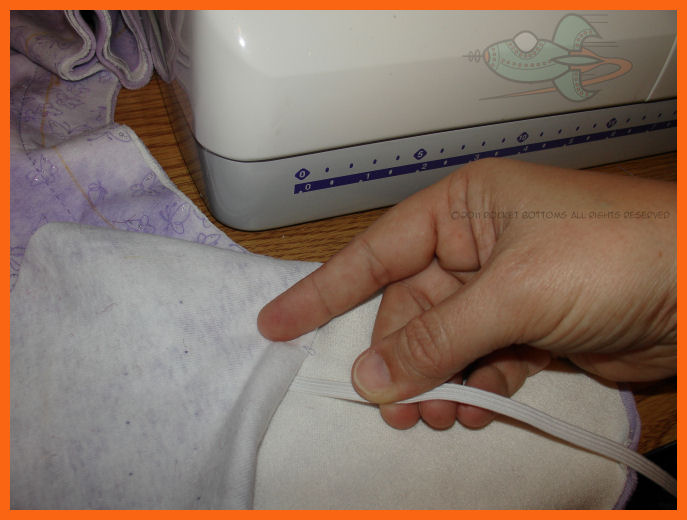
Make sure to leave a tail of elastic that extends past the elastic mark point. Now you are ready to sew the elastic in.

I use a wide three step 3 zigzag when I sew in my elastic. Tack the elastic in securely then sew with your needle so it stops in the down position and firmly pull your elastic against your guide line. Line your presser foot up with the guide line and stitch down your elastic.

Do this for all elastic areas, when you are finished it will look like this.

Remove your basting stitches and serge the diaper up. You have even perfectly placed elastic and you will get this result each and every time you sew in your elastic like this.

This diaper has slightly ruffled legs. To have a less ruffled look have your guide line closer to the cut line. Make sure that you do keep at least 1/4 of an inch distance from the cut line and your guide line so you don't serge into your elastic. For a more ruffled leg sew the guide line slightly further into the diaper.
Diaper on smallest rise setting.

Inside of diaper showing nice evenly placed elastic. Ignore the fact that I need to toss this diaper in the wash to remove my marker marks.

Diaper on largest rise setting.

♥ Krista
Thanks for the tute Krista! New technique to try:)
ReplyDeleteYou're welcome! I am terrible with tacking and then sewing over that lol. I always miss the elastic. So I do it this way and it's always perfect for me.
ReplyDeleteI guess that you should put the front hidden snaps on before you serge?!
ReplyDeleteYes unless you make a pocket fitted, then you can add them after serging the diaper together!
ReplyDeleteany good tips for serging after elastic is already in place? I always seem to get gaps in the loopers!
ReplyDeleteI know this is a really old post, but do you have the pattern for this diaper? It's really cute and I'm a newb to sewing/pattern drafting. Thank you!
ReplyDeleteThis pattern is available for sale at www.rocketbottoms.com.
ReplyDeleteKrista