I don't have pictures of the first few steps but they are easy :) First you want to trace out your pattern piece onto your PUL. Don't cut it out! You want to make sure you have plenty of material to hoop so wait to cut your diaper out until after you embroider.
You will want to find the center of the diaper. Fold the diaper cut in half length wise, mark the center. Draw a line across the back of the diaper between the back leg elastic points. Extend your center mark down the diaper so you get a crosshair. This is where you want your embroidery to be centered. Most of the time I will draw a box that is slightly larger than the size of the design I am embroidering as it helps get it lined up in the hoop when I use a home machine.
The following pictures were made using a commercial embroidery machine but the process is still the same if you use a home machine.
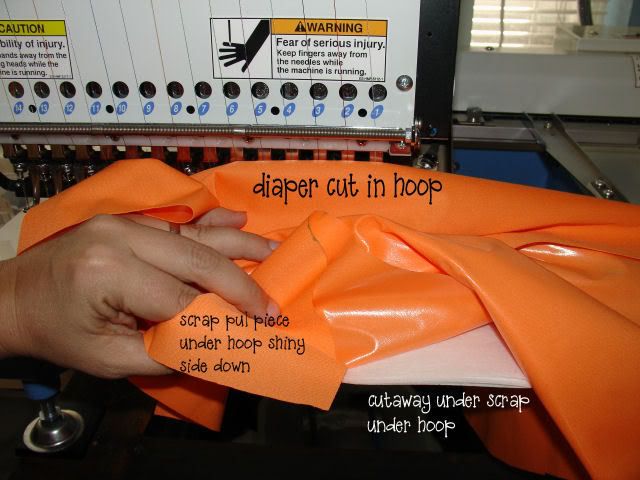
Here I have hooped just the diaper cut. You do not have to hoop your scrap PUL piece and stabilizer. These can be floated under the hoop.
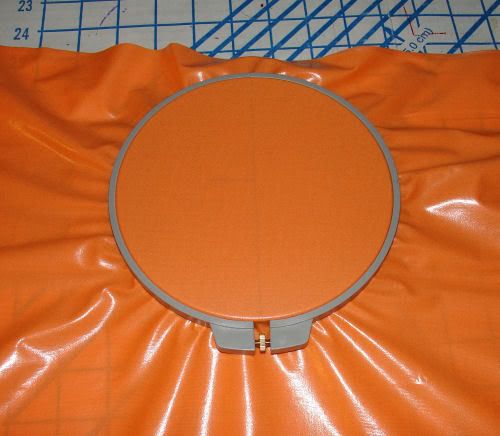
When you load your hoop onto your machine you will place your scrap piece of PUL under the hoop, shiny side down and your cutaway stabilizer under that.
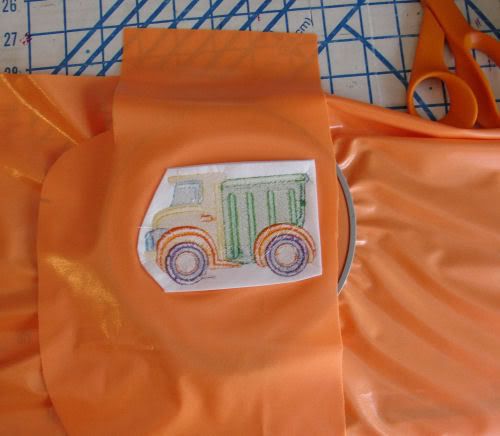
When you are finished stitching the design, remove the hoop from the machine and trim your stabilizer close to the design. When you are finished with that it should look something like this.
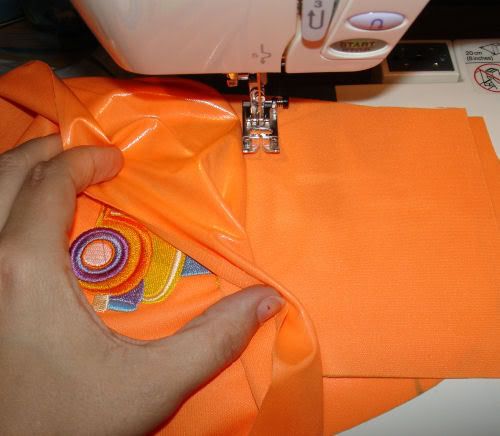
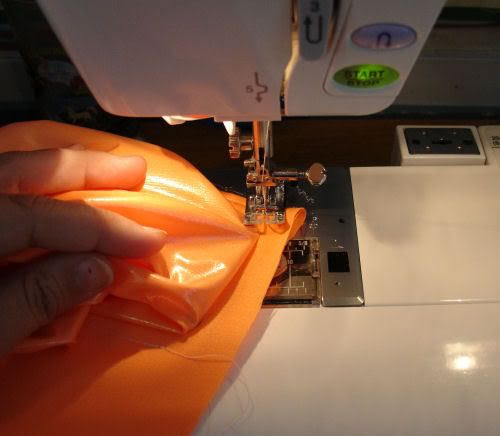
Now you will fold your scrap piece of PUL up and over the back side of the embroidery to cover it.
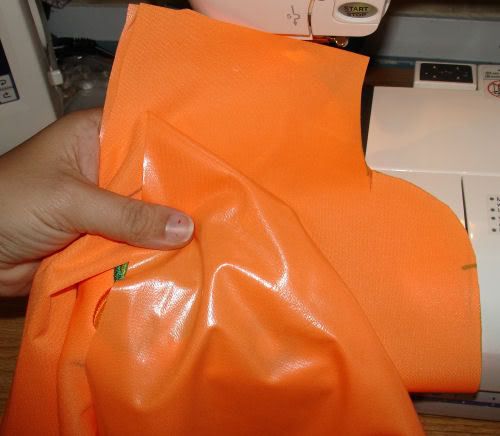
Now you will sew around the embroidery design on the scrap piece of PUL to encase it. Fold your diaper cut out of the way, you don't want to sew that to your scrap.
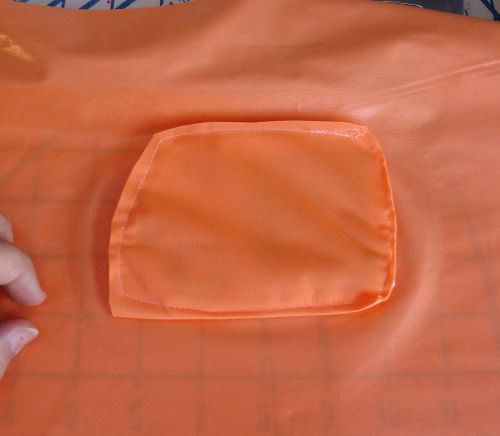
When finished you will have something that looks like this picture.

Trim around the encased design to remove excess scrap PUL. Your embroidery is now totally encased. When you toss the diaper into the dryer after sewing it up the heat will seal the holes in the PUL covering the embroidery and it will prevent wetness from coming through your design.
Sew the diaper up following the construction instructions on the pattern you are using and you are all set!
♥ Krista
Just to make sure I am seeing this correctly...when you fold over the scrap PUL you stitch it just to itself? So no extra stitching is seen from the outside next to the embroidery?
ReplyDeleteExactly! You stitch around the design only through the scrap so the back is sealed and no stitching shows.
ReplyDeleteKrista
OMG, thank you so much, I have a nice embroidery machine and I was wondering how it would be possible to embroidered on them... I will try this soon!!!! Merci!
ReplyDeletehm.. I am reached here by searching for calibration details of embroidery machines ... think it is right place for it and this site should be an encyclopedia for the embroidery business.
ReplyDeleteSo sorry if this posting 3 times!!! Issues!:-)
ReplyDeleteKrista, thoughts on how to do this on an existing pocket? Looking to do ot on a Charlie banana for baby's first Christmas. Thoughts? Turn it into a cover and go through the micro fleece?
Wow, such a great tutorial. This was really helpful.
ReplyDeleteKristen from Embroidery Digitizing
Wow this a great think and great information about Digitizing services
ReplyDeleteWow that's nice blog about embroidery digitizing
ReplyDeleteThank you for sharing this detailed tutorial on how to back and seal embroidery on PUL for diapers! Your step-by-step guide, from marking the center to encasing the design with scrap PUL, is incredibly helpful. Ensuring no leakage while adding beautiful embroidery digitizing By Digitizing Buddy is a game-changer. This method will be beneficial for both beginners and experienced embroiderers looking to enhance their diaper-making skills. Keep up the great work, Krista!
ReplyDelete