I use this technique on all sizes of onesies and shirts from newborn to small child. The end goal is a stitch out that is smooth with no puckering, stretching or distorting in the fabric you are stitching on. Doing your small clothing items this way will have you achieving that great result time after time.
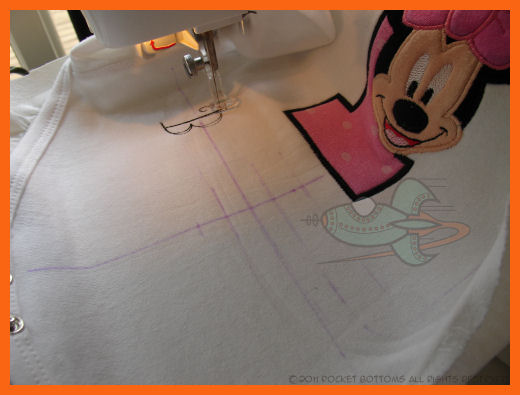
First thing I do is mark the center of the item, from collar to hem, I will be stitching on. If I am stitching something smack on the chest of the shirt I will determine my layout along that center line. I like to stay a couple of inches below the collar when possible as that makes hooping easier and the top of the shirt more stable. You can see in this picture that I shifted where I wanted the design to be so I could add in a second hooping for the lettering.

Now that the placement is marked let's pop that side seam! Grab your seam ripper and start picking apart the seam starting at where the binding along the bottom of the onesie is joined.

Being that this onesie is an 18/24 month onesie I decided to stop at where the sleeve joins the body of the onesie.

With the seam open it's time to prep the back of the onesie for hooping. I ♥ my Machine Embroidery spray. This is the only one I will use. It does not gum up my machine at all. Lightly spray the backside of the onesie and let it set per product directions for 10 minutes. This is important! When it sets up it dries a little and you are not stitching on wet sticky adhesive spray. It also makes the garment repositionable if you need to adjust anything.

When the spray has set up it is time to take your piece of cutaway and smooth it onto your garment.

It is now time to hoop up your garment. Uh oh....looks like I didn't open the seam up enough to keep the garment easily out of the way while stitching my design. If this happens to you grab the seam ripper and open the seam up to the end to give you a little more room. I don't like to have to hold a garment out of the way while stitching out a design.

Load your hoop onto your machine. You can use hair clips to gather up the excess material on the onesie if you like. It is not necessary. Just keep it to the side of the hoop and make sure it doesn't find it's way under the hoop.

As I am doing an applique design on this onesie I cut out all my fabric pieces in advance (not shown) and prepped them with the embroidery spray so when I needed them they would be ready. With the design loaded and hoop in place you are ready to go. The reason I use the machine embroidery spray is because I do not fussy cut my pieces. In my experience it is too easy to be off in your cutting and this can affect the outcome of your project. So I like to print off a full scale printout of the design from my software and use that to get measurements for my blocks. Cut the blocks out, prep them and set them aside until I need them.
Here I have smoothed down my first fabric block in my design.

When each block finishes remove your hoop from the machine but do not unhoop your project! Carefully trim the excess fabric from the block. Trim close to the stitching but take care not to clip stitches. When finished trimming, load hoop back up and go to next step.
For this design once all my fabric pieces have been stitched and trimmed it's time for detail stitching. As all my blocks were prepped they laid nice and flat and stayed put while being stitched down.

When the design is finished remove the hoop from the machine and trim all the jumps on the backside. I like to keep the back just as clean looking as the front.

For this project I need to hoop my garment a second time. This will be easy to do since I already made my placement lines. With the fabric being prepped already there is no need to spray it again to get it ready. Just hoop a piece of cutaway stabilizer in the hoop.

Smooth the garment down onto the stabilizer, taking care to line up your placement marks with the guide marks on the hoop's inner ring.

Load the hoop, start up the design and stitch it out!
When you are all done, remove the hoop from the machine and pop it off your garment. Now trim up the jumps if any and trim your stabilizer.

It is now time to sew that seam back up. Pin the onesie/shirt closed and stitch it back together following the original stitching line. Finish the edge either with your serger or use an overlock stitch on your sewing machine.
Your garment is now ready to be rinsed off and dried so that you can iron on protective mesh covering. I like to cut my cover mesh to be about 1/2 an inch to 3/4 of an inch bigger than my design so I know all the stitches will be covered and there is nothing but softness touching baby's skin.

All done!
♥Krista
No comments:
Post a Comment