Saturday, August 27, 2011

The In A Snap OS Diaper Cover pattern has been released!

Man oh man am I happy with how this one turned out.  I ended up adding a couple of options to it at the very end of finalizing the pattern and I'm so glad I did.  I think they really add that little something that was missing when it was just a plain old cover pattern.


The pattern includes side wall gussets to help contain those messy blowouts and leaks from side sleepers as well as options to make it an In A Snap Tuck-It-In cover.  You can add snaps to the cover under the Tuck-It-In back flap and make yourself a very nice AI2 style cover/diaper.


Gussets!  They are SO easy to do.  I have full color step by step pictures of the process in the instructions!


This is the cover with the Tuck-It-In option and the gusset option.  

The pattern also includes full color photos on how to make your FOE seamed so it has a professional finished look to it.  It is really easy to do!


The pattern is currently listed on my Hyenacart store for $6.  It is a PDF file and I email out the download link as soon as I see the order.  My listing says you will get your link within 24 hours but that would be the rare instance.  I try to be really quick and send out links as soon as orders come in.

I also take custom orders for any of the products made with my patterns if you don't sew but see something you like!

Hope everyone is enjoying their weekend so far!

♥Krista


Wednesday, August 24, 2011

Rocket Bottoms Giveaway on The Tree Huggin' Momma blog is up!

If you would like a chance to win a TWIST diaper made by me take a moment and stop by The Tree Huggin' Momma blog.  I sent her a diaper to use on her little one and give a review on the product as it was a brand new design that hadn't seen much action outside of my testing groups.  She has instructions on the blog for how to enter the giveaway.  Stop by and show her some love!

Krista

Tuesday, August 23, 2011

New patterns coming soon and a giveaway for a Rocket Bottoms OS Fitted Diaper!

The Side Snapper is in testing right now and all that is going great!  This one should be ready around the first of September.  I am in the process of finalizing the In A Snap OS Cover pattern and should have that ready for the stores by the end of this week.

I will be making revisions to the 2 Step System pattern as soon as I get the two current pattern projects wrapped up.  As well and re-digitizing the OS Fitted in an attempt to streamline the files and cut down on pages to print.

If you would like to enter a giveaway featuring a OS Fitted made by me stop by Crazy 4 Fluff's blog here and read all about it!  http://networkedblogs.com/lNMTl This contest is open for entry through the 31st of August so hurry over and enter today!

I have diapers being reviewed on 3 other blogs at the moment and will post links to enter their giveaways as soon they are posted.

Krista

Sunday, August 14, 2011

Photo sew-along using the TWIST pattern

While there are photos in the instructions of this pattern I had a few people ask for more pictures to follow along to when putting this pattern together.  So here you go!

First step is to cut out all your pieces.  I like to put my inner pieces grouped together and my outer pieces grouped together as each set needs something done to them before sewing the inner and outer layers together.


 Now that my pieces are all grouped I like to serge the bottom of the loop fabric for the tummy panel.  You don't have to do this as this edge will not unravel.  I think it looks more finished this way.
 On the back leak guard piece you will sew on your laundry tabs if you are making the diaper hook and loop like I am in this example.  Use a zigzag stitch or a straight stitch.  I prefer a zigzag because I feel it holds up better in the long run from repeated use.
 Next you will pin and sew the leak guards to the inner poly layer.  The seam allowance is 3/8th of an inch here just like on the rest of the diaper.
 You can leave the edges unfinished, pink them with pinking shears or use a serger to finish them.  I serge them.
 If you serge the edges here trim off about an 1/8th of an inch.
 This is an optional step as well but I really like how it looks when this part is top-stitched.
Now this part you have some wiggle room with placement.  You can have your opening a bit lower than mine but I like to have the top edge of my welt pocket piece 3/4 of an inch below the top edge of the leak guard.
 To make the welt pocket opening you will stitch a narrow rectangle on your piece.  Mark in a half inch on each short edge of the pocket piece.  These marks are where the short sides of your opening will be.  Starting at one side of the piece stitch along the folded up edge.  When you reach the second mark, pivot your layer making sure that your needle is in the down position, stitch two stitches and pivot again.  Continue stitching straight across the piece until you reach the first mark.  Pivot, stitch two stitches, pivot again and stitch two or three stitches on top of the starting stitches then lock your stitches.
 What it looks like from the back side.  My rectangle got a touch out of shape.  If you stitch slowly and keep everything lined up your rectangle will be more perfect.

 Fold the layer in half and snip in the center of the rectangle all the way to each edge.  Take care not to snip the threads on the short ends.

 Now you tuck in the top part of the piece down into the opening.  Fold in the edges and pin to secure.
 On the back side make sure the ends are nice and neat, pin to secure.
 Stitch the folded edges.  Make sure that you stitch down far enough to catch the folded edges on the back side.

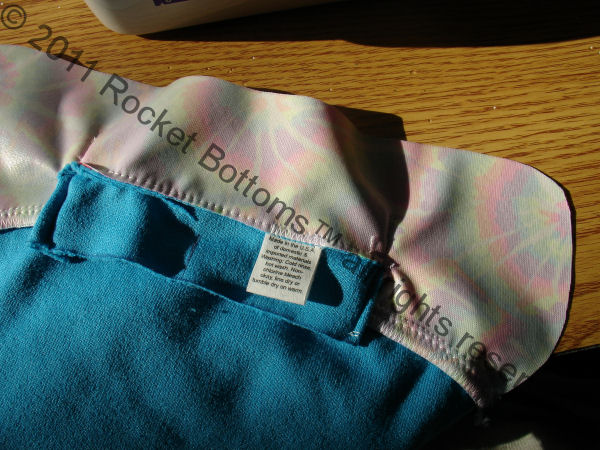
 If you are making this diaper to sell you will need to add your CPSIA compliant label.  I like to sew mine in right at the back edge of this pocket.  I tuck the raw ends of the label under the seam at the PUL and the microfleece and stitch down with a zigzag stitch.
 Repeat the above steps with the back pocket opening only come down further, more like 1 1/4 to 1 1/2 inches from the edge.
 Once your back pocket opening is complete pin along your marks for the gusset casing.
 Stitch 3/8th of an inch from the folded edge to create your casings.  Leave both ends open so you can thread in your elastic later.
 Now that your inner layer is complete it is time to finish the outer layer.  Sew your loop fabric or loop tape to the front of the diaper now.  If using loop tape leave 1/2 an inch on each side so you can turn and top-stitch without loop tape in the seam.  If you are applying snaps do this now and be sure to re-enforce your snaps with a scrap of PUL.
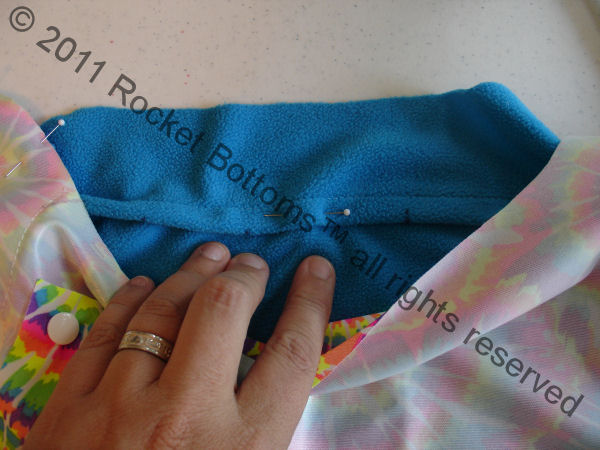
 Add your rise snaps if you are making a OS and now it's time to pin the pieces together.  To keep the gusset casings out of the way I like to pin it down in the center.
 Now you are all pinned together and ready to sew it up.
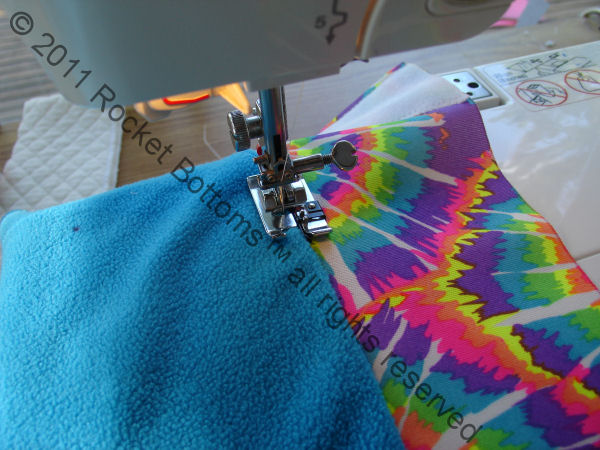
 Since you have two pocket openings to turn the diaper through you do not need to leave an opening.  Stitching PUL to PUL can be tricky so use a walking foot, Teflon foot, tissue paper, or wax paper if you need to.  I do not have a walking foot or a Teflon foot and I dislike sewing on paper and having to gently pull it off so I lengthen my stitch length and go slow pulling gently on the fabric so the machine is not easing my bottom layer and creating ripples and tucks in the top layer.  Make sure your needle will stop in the down position so you can easily readjust as need be!
 Once you have it all sewn up add in your elastic and you are almost done!  Make sure to trim all curves and corners.  Turn right side out and top-stitch the entire diaper making sure to stitch around the elastic areas to case them.
 You will take your gusset elastic and put a safety pin on one end and thread it through a pocket opening.

 I like to put a straight pin at the mark on the end with the point up so when I pull it through it will stop at the end of the casing stitches.
 When I hit the end I push the pin up to mark where I need to tack down the elastic.
 Both ends are now secure with straight pins and ready to be tacked down.
 Elastic securely tacked down.
 If you are using hook and loop I like to tack the edges together on my tabs prior to sewing them on to keep them from slipping around.
 Sew your hook and loop tabs on to the diaper.  You don't have to have them extended.  I make them this way because I like how it looks.  You could even just use squares of hook and loop on the wings to create your crossover tabs if you don't want extended tabs.
 All done!  Toss it in the wash to rinse off our sewing marker and dry it on hot to seal the holes in the PUL then stuff and put on your baby!

Thursday, August 11, 2011

Adjusting the elastic on the inner gussets when using the TWIST pattern

Did you know that you can use buttonhole elastic (BHE) for the gussets on the TWIST?  Using small buttons sewn at each end of the casing and BHE you can make your gussets on the OS TWIST totally adjustable for your growing baby.  You can find diaper making BHE  here in Serena's Assunta Store.

You can also adjust the elastic by undoing the tack down stitches at each end of the casing and loosening or tightening your elastic.  This is also how you would change out the elastic should you need to replace it.

Friday, August 5, 2011

Sharing a review on a Newborn TWIST

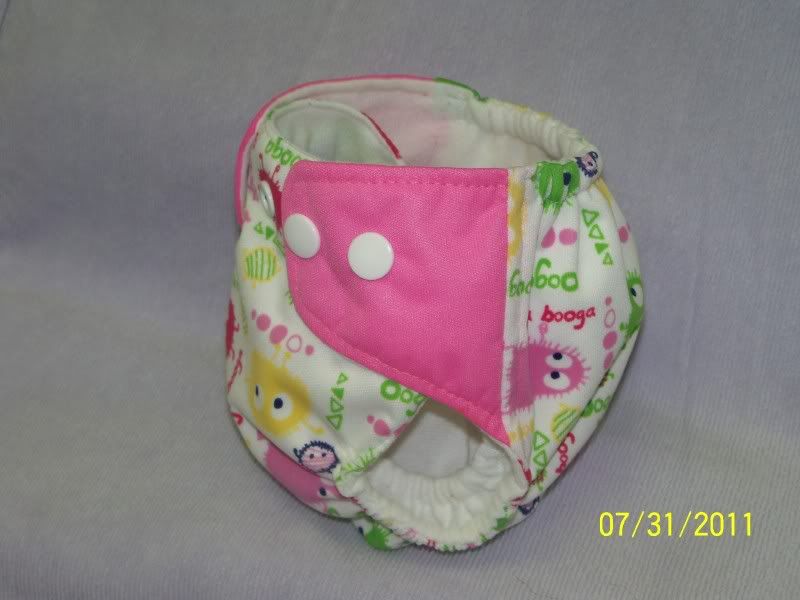
One of my testers made a newborn diaper to give to another mama.  This diaper was made by Nina ♥.  She used an adorable Ooga print pul outer with contrasting tabs.  Nina made this one using the single snap row option and two snaps per wing.  Making one wing with crossover snaps makes this diaper fit the teeny babies nicely!! SO cute!!  Here is what that mama had to say about the TWIST diaper:

"LOVE it! I immediately tried it on her yesterday. I don't have any inserts that are as small as the diaper, I used a Flip stay dry and it was about an inch too long in each direction. Maybe a premie insert would fit it better? I didn't care. She was on an eating marathon yesterday, she's never drank as much as she did yesterday, I thought she was going to burble everything up but no, she was just that hungry. She peed a gallon into the diaper and much to my surprise it didn't leak at all. I would have thought the ends of the insert would have wicked up and out but they didn't. As for the fit I think she's 7 1/2 lbs (max) right now and she's using the last 2 snaps. I'll take pics some time today and send them to your email. It fits really well and I wish I had them 3 weeks ago when she was born and just about 6 lbs. This particular size is perfect for a 6 lb newborn which is nice because nothing fits a 6 pounder all that well. Its like an in between premie and everyone's bigger sized newborn."


Video tutorial for inner layer construction on the TWIST coming this weekend!

I am hoping to enlist a family member as my videographer this weekend so that I can put together a few video tutorials for the TWIST pattern.  My main focus will be constructing the inner layer and how to do the modified welt pocket openings.  I have been asked if the gussets can be made with PUL and I will be putting together a tutorial on how to do this modification with the TWIST pattern as it is totally doable.

Let me know if you have a tutorial you would like to see made with one of my patterns and I will be happy to make one!

I hope everyone is having a wonderful weekend so far!

Krista